How to Reupholster a Dining Chair Seat: Step-by-Step Guide
Most secondhand dining chairs have a drop-in seat you can unscrew and recover in an afternoon. Here is how to check the chair, choose fabric and staples, stretch the fabric and finish the underside.
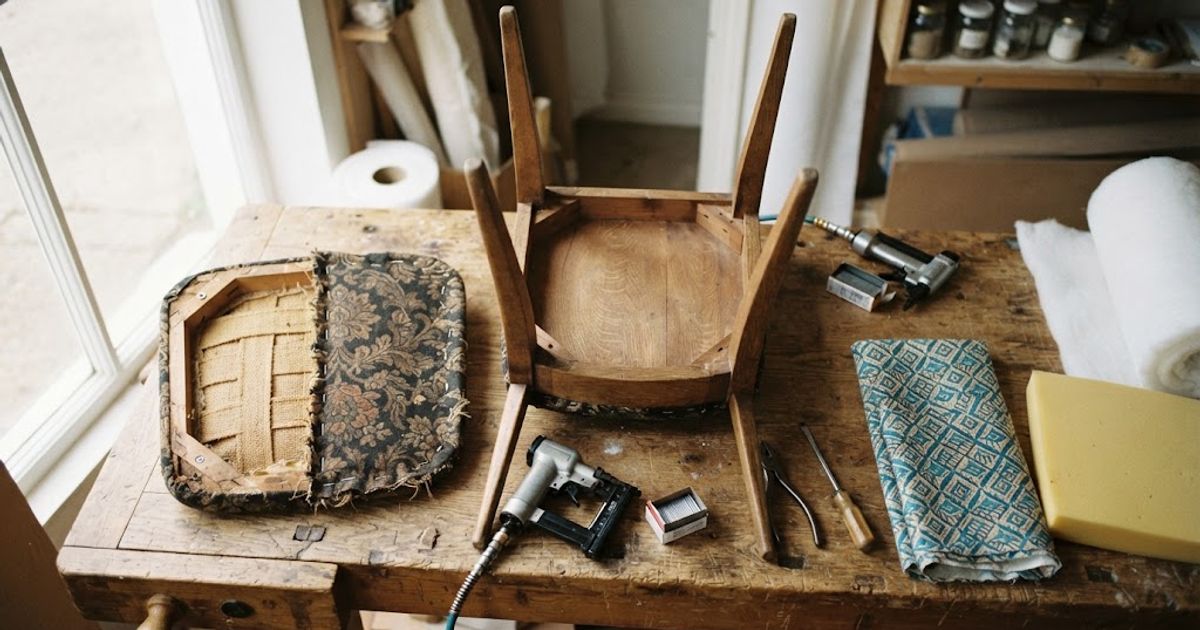
Quick summary: To reupholster a dining chair seat, unscrew the seat from underneath, remove the old fabric and staples, check or replace the foam, then staple wadding and upholstery fabric over the base, working from the centre of each side. Choose staples that hold the fabric without poking through the seat base. Home Beautiful says that is usually 8–10 mm. Cover the underside, then screw the seat back in.
Reupholstering a dining chair seat is one of the easier ways to rescue a secondhand chair. Many chairs have a drop-in seat held by a few screws, so you can lift it out, recover it at a bench and screw it back in. This guide covers how to check the chair, which fabric and staples to choose, how to stretch the fabric and how to finish the underside. The steps follow two Australian tutorials, and where we add our own advice, we say so.
Can You Reupholster a Drop-In Dining Chair Seat?
Usually, yes. Turn the chair over. If you can see screws holding a padded seat to the frame, the seat comes out, and the job is mostly staples and fabric. LJ Hooker’s DIY ambassador Geneva Vanderzeil rates it about three out of five for difficulty and gives roughly an hour and a half for one chair. Treat that as a guide for a first chair, since time depends on your tools and how many chairs you are doing.
Seats fixed into the frame, or chairs where the fabric wraps over the back and arms, are a bigger job. See the professional section below.
What You Need
Home Beautiful’s guide with Little Red Industries lists:
- A heavy-weight fabric
- Wadding
- Upholstery foam
- Pliers
- A staple gun and staples
- A hammer
- Scissors
- A screwdriver
You will also want calico or a non-woven fabric to finish the underside, and a clean surface to work on.
What Fabric Is Best for Reupholstering Dining Chairs?
Home Beautiful uses a heavy-weight fabric, and that is a sensible starting point for a seat that gets used every day. A few things to think about before you buy:
- Made for seating: Choose upholstery-grade fabric rather than a light fabric made for curtains or clothing. If you are unsure, ask the supplier whether it suits regular seating.
- Durability and cleaning (our advice): Dining chairs collect spills and crumbs. Pick a fabric you can wipe or vacuum, and check the care instructions before you commit.
- Pattern: Home Beautiful centres the pattern on the seat. For a set, cut every seat with the pattern running the same direction, so stripes and motifs match across chairs.
- How much to buy: The LJ Hooker tutorial allows at least 10 cm around the edge of the seat base for pulling over and stapling. Measure one seat, add that allowance, multiply by the number of chairs, and buy a little extra if your pattern needs matching (our advice).
Choose the Right Staples
According to Home Beautiful, staples should be no longer than the thickness of the seat base, usually 8–10 mm. Seat bases vary, so measure yours rather than assuming. Our advice: choose a staple that grips the fabric firmly without coming through the other side, and try a few on a scrap of similar board if you have one.
Hold the staple gun flat against the surface when you fire it. Home Beautiful notes that this gives the cleanest result, and an angled gun leaves staples sitting proud or bent.
Before You Start: Check the Chair
Spend five minutes on the chair before you buy fabric.
- Wobble: Rock the chair and check the joints. A loose frame needs fixing first, since new fabric will not make it sturdier.
- Seat base: Press on the underside of the seat. Cracked or soft plywood should be replaced rather than recovered.
- Smell and stains: If the old foam smells musty or is stained through, plan to replace it.
- Paint on the frame: Older painted frames may contain lead paint. If you plan to sand or strip the legs, read our guide to testing vintage furniture for lead paint first.
- Exposed timber (optional): Only if timber on the seat base or frame will stay visible and needs refinishing, do it before the fabric goes on. Home Beautiful sands to remove splinters, then stains or varnishes with two coats and leaves it to dry. Skip this if the timber is fine. Home Beautiful also notes you may find a shaped plywood seat under the old upholstery that looks good simply sanded and stained.
How to Reupholster a Dining Chair Seat
1. Remove the seat
Turn the chair over and unscrew the seat from underneath. The screws can be stiff, but the seat usually lifts away once they start to move. Keep the screws in a small container. Home Beautiful also suggests keeping any fasteners you remove so you can reattach parts later.
2. Take off the old fabric
Use pliers to pull out the old tacks or staples, taking care not to tear the foam if you plan to reuse it. Home Beautiful says that if the foam is in good condition, you can leave it attached and skip ahead to the wadding. The LJ Hooker tutorial also checks whether the foam and cover need replacing before deciding.
Our advice for a secondhand chair: strip the old cover so you can see what is underneath. A cover can hide stains, odour or crumbling foam that you would rather find now than after the new fabric is on.
3. Replace or secure the foam
If the foam is flat, crumbling or smells, replace it. Cut a piece of upholstery foam to the same size and shape as the base. Home Beautiful staples into the side of the foam to hold it around the base. If you would rather not staple into foam, a spray adhesive made for foam is a common alternative (our advice). Check the label says it suits foam, and follow the directions. Foam that is already in good condition and sitting firmly can stay as it is.
4. Add the wadding
Centre the base face down on the wadding, fold the wadding over and staple at the centre of one side. Pull it taut on the opposite side and staple, then work around the base. Trim the wadding about 10 mm from the staples, as Home Beautiful suggests, so it does not bunch under the fabric.
5. Cut and place the fabric
Place the seat on your fabric and cut with generous overlap. The LJ Hooker tutorial allows at least 10 cm around the edge. If the fabric has a pattern, centre it on the seat before you cut.
6. Stretch and staple
Tension is what makes the job look professional. Start in the middle of one side, fold the fabric over and put in one staple. Pull the fabric tight on the opposite side and staple there. The LJ Hooker tutorial puts one staple on each of the four sides first so the fabric cannot end up loose on any side.
Then work around the base from the centre of each side, pulling out creases as you go. Our advice: aim for fabric that is taut and even, but not so tight that it distorts the foam or pulls the seat out of shape. If a pattern drifts out of line, Home Beautiful’s tip is to pull out the odd staple with a screwdriver and reposition the fabric. Leave the corners until last.
7. Fold the corners
Corners are the slowest part, so go carefully. The LJ Hooker tutorial folds the leftover fabric at each corner into a point, presses it down and secures it with staples. Stretchy fabric is more forgiving here. Heavy fabric holds a crisp fold but needs more patience. Trim any bulk so the corner sits flat.
8. Finish the underside
Trim off excess fabric, then cover the underside so raw edges and staples are hidden. Home Beautiful uses calico, folding the edges under before stapling so they do not fray. The LJ Hooker tutorial uses a non-woven fabric, which does not fray and needs no folded edges.
9. Clean the frame and refit the seat
Before you screw the seat back in, wipe the frame down with a rag to remove dust and dirt. If you want to repaint the frame, now is a good time, while the seat is out of the way. Then screw the seat back in. Home Beautiful adds a tip for vintage chairs: worn feet can be replaced with new rubber tips to protect your floors.
Common Mistakes to Avoid
- Staples that are too long: Measure the base before you load the gun.
- Finishing one side before the opposite side: Alternate sides so the tension stays even.
- Pulling the fabric too slack: A loose cover wrinkles and sags once someone sits on it.
- Rushing the corners: Go slowly, whatever fabric you use.
- Covering over bad foam or a wobbly frame: Fix the problem first.
When to Hand It to a Professional
A drop-in dining seat is a good first project. A sofa or armchair is a different level. If you are weighing up a bigger piece, our guide to reupholstering a secondhand sofa in Melbourne covers what the professional version involves and when it is worth it. Chairs with fixed seats, deep buttoning or wrap-around backs are also worth taking to an upholsterer rather than learning on them.
Finding Chairs Worth Redoing
The best chairs to practise on have a solid frame, a removable seat and a base in good shape. Browse chairs on Zirkly’s Melbourne listings, and message the seller before you go. Ask for a photo of the underside so you can see whether the seat unscrews, and ask whether the frame is firm. A chair with tired fabric but a sound frame is often the better buy, because the fabric is the easy part to change.
Sell Chairs You No Longer Need in Melbourne
If you have a finished set that no longer fits your table, or chairs you have decided not to restore, list them on Zirkly and let a local buyer take them on.
Frequently Asked Questions
Can I reupholster dining chairs myself?
Yes, if the seat is a drop-in type. You need a screwdriver, pliers, a staple gun, scissors, foam or wadding, and fabric. Start with one chair before you commit to a full set.
How long does it take to reupholster a dining chair seat?
The LJ Hooker tutorial estimates about an hour and a half for one chair. Allow more time for your first one, and for replacing foam.
What length staples should I use?
Home Beautiful says staples no longer than the thickness of the base, usually 8–10 mm. Measure your own seat base, and choose a staple that holds the fabric without coming through the other side.
Do I need to replace the foam?
Only if it is flat, crumbling, stained or smells musty. If it is in good condition, both tutorials say it can stay.
What fabric is best for a dining chair seat?
Home Beautiful recommends a heavy-weight fabric. Choose upholstery-grade fabric that suits regular seating and is easy to wipe or vacuum, and centre any pattern on the seat. For a set, cut every seat with the pattern running the same direction.
Should I remove the old fabric first?
The tutorials differ. Home Beautiful removes the old cover, while the LJ Hooker tutorial upholsters over the top when the foam and cover are in good condition. On a secondhand chair, stripping it lets you inspect the foam and base properly.
How do I finish the underside of the seat?
Cover it with calico, folding the edges under so they do not fray, or with a non-woven fabric that needs no folded edges. Staple it neatly over the raw edges.
What if the seat is fixed and does not come out?
That is a bigger job, and the staples and fabric are harder to reach. Consider asking an upholsterer, or choose a chair with a removable seat for your first project.
Sujith
Zirkly Team
Sujith is the Founder of Zirkly, Melbourne's dedicated secondhand furniture marketplace. He writes about Melbourne's secondhand furniture market, consumer behaviour, and the circular economy, drawing on his experience building Zirkly and what helps furniture listings sell across Melbourne.